应用 | OpenCV + OpenVINO实现人脸表情识别
 openlab_4276841a
更新于 4年前
openlab_4276841a
更新于 4年前
好久没有写点OpenCV + OpenVINO的应用了,前几天上课重新安装了一下最新OpenVINO2020.3版本,实现了一个基于OpenCV+OpenVINO的Python版本人脸表情识别。100行代码以内,简单好用!
人脸检测
人脸检测使用了OpenCV中基于深度学习的人脸检测算法,实现了一个实时人脸检测,该模型还支持OpenVINO加速,所以是非常好用的,之前写过一篇文章专门介绍OpenCV DNN的人脸检测的,直接看这里就可以了解详情:OpenCV4.x中请别再用HAAR级联检测器检测人脸,有更好更准的方法
表情识别模型
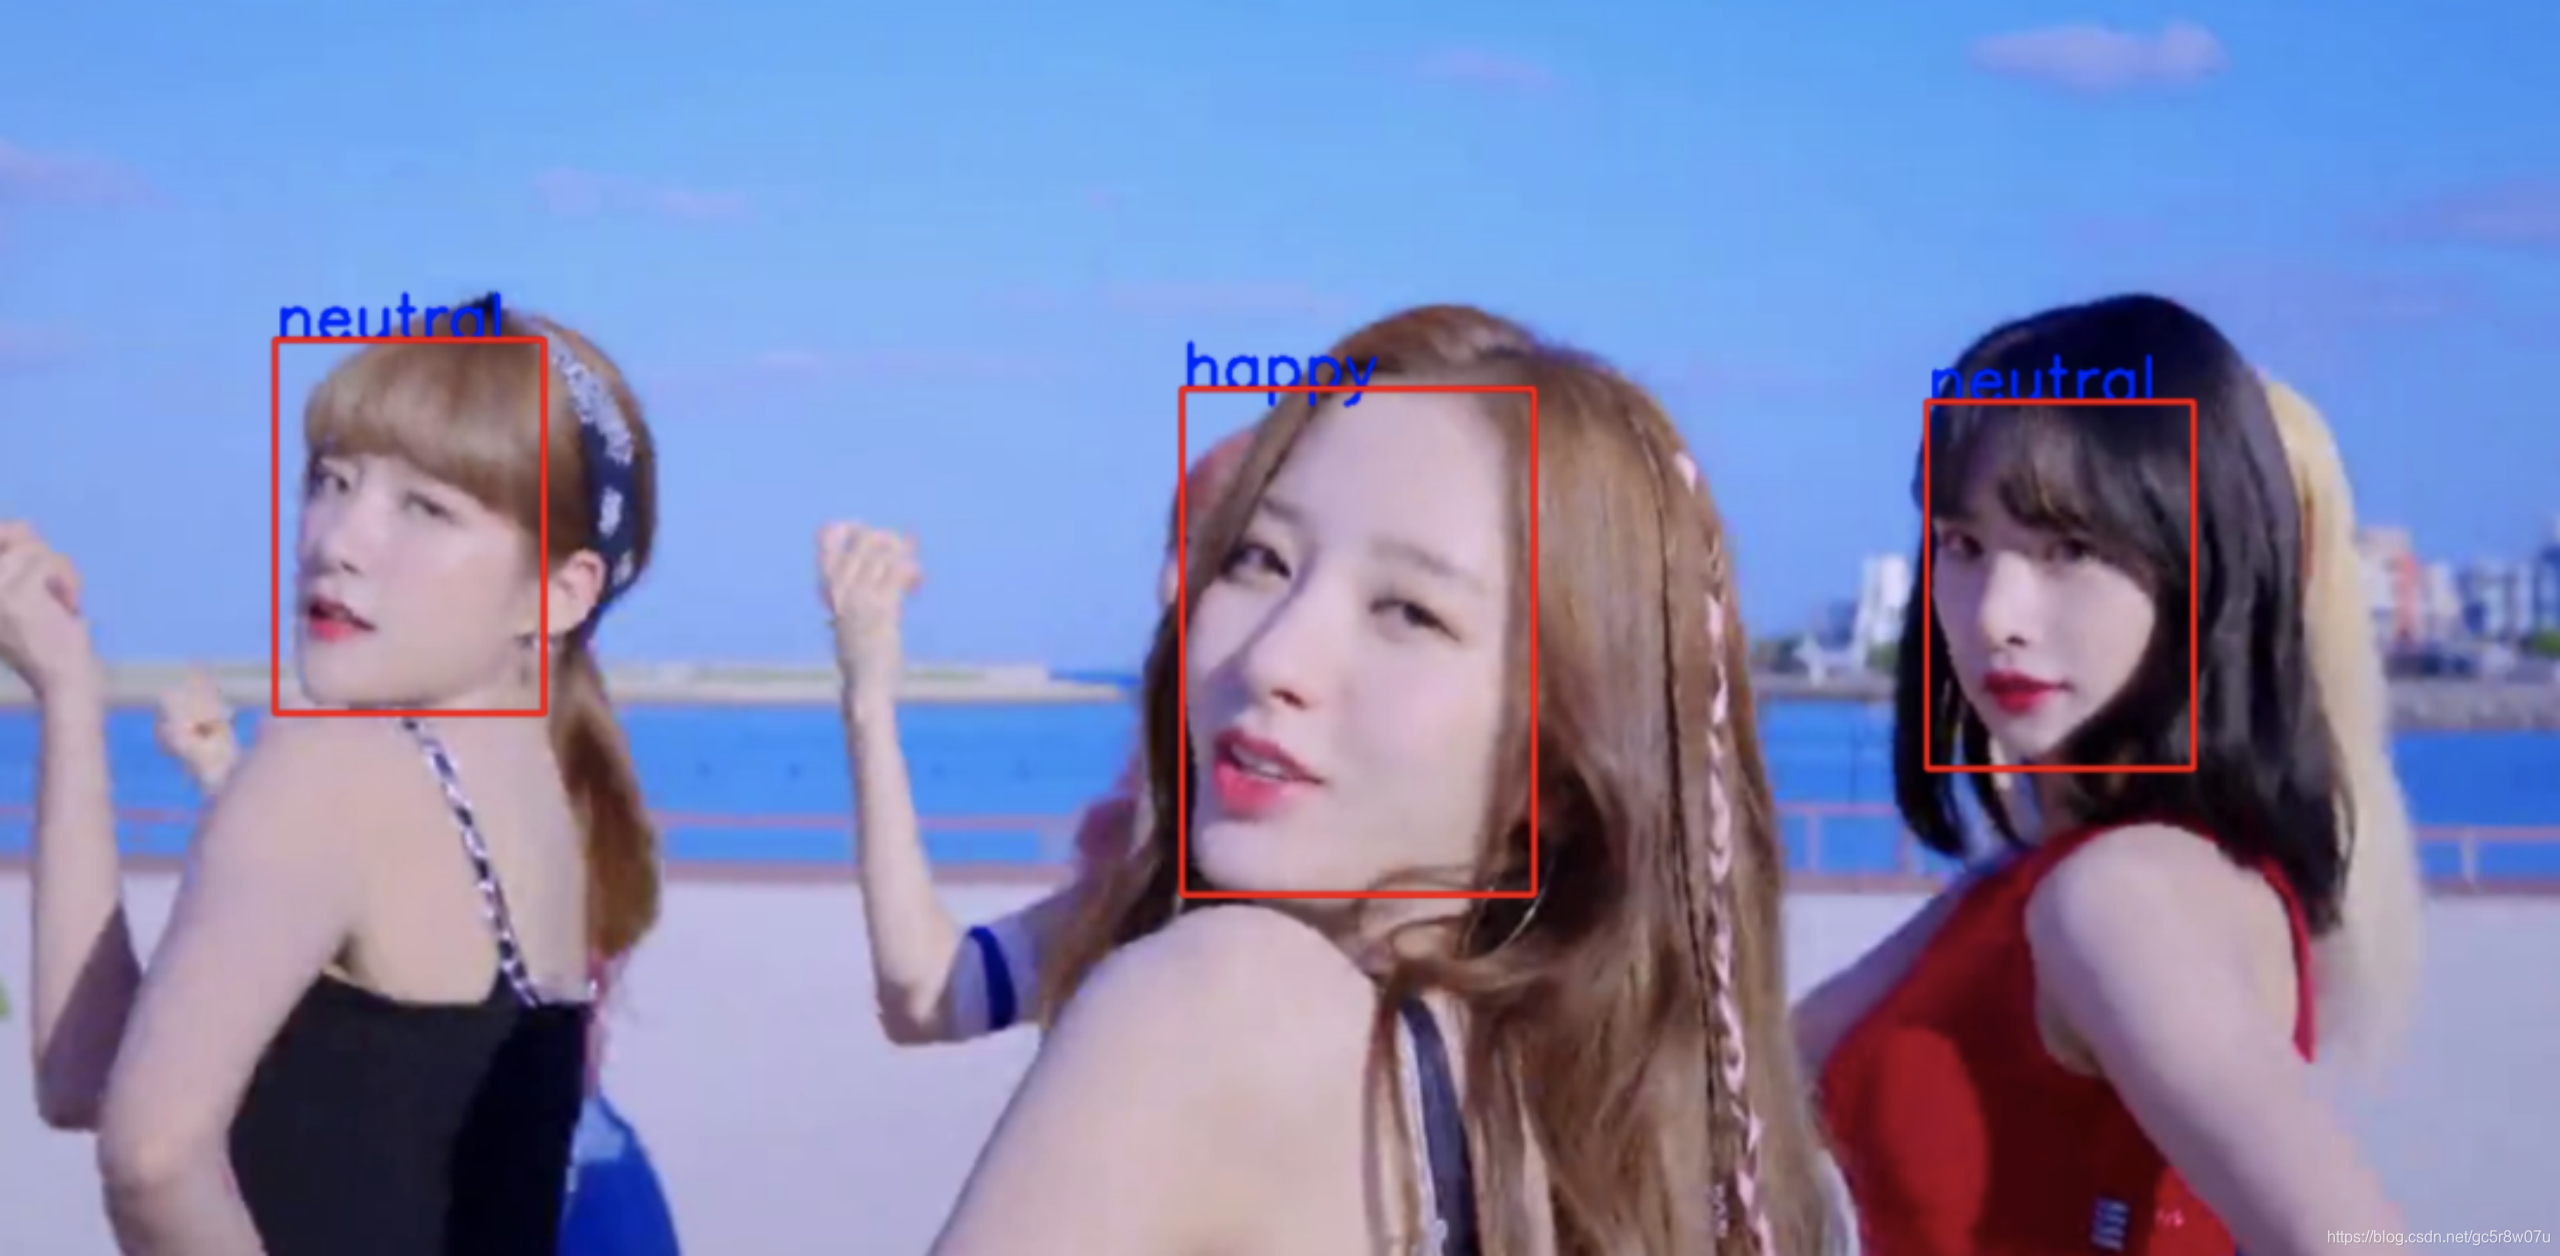
使用OpenVINO模型库中的emotions-recognition-retail-0003人脸表情模型,该模型是基于全卷积神经网络训练完成,使用ResNet中Block结构构建卷积神经网络。数据集使用了AffectNet表情数据集,支持五种表情识别,分别是:(‘neutral’, ‘happy’, ‘sad’, ‘surprise’, ‘anger’)输入格式: NCHW=1x3x64x64
输出格式:1x5x1x1
代码实现
首先基于OpenCV实现人脸检测,然后根据检测得到的人脸ROI区域,调用表情识别模型,完成人脸表情识别,整个代码基于Python语言完成。加载表情识别模型并设置输入与输出的代码如下:
model_xml = "emotions-recognition-retail-0003.xml"
model_bin = "emotions-recognition-retail-0003.bin"

labels = ['neutral', 'happy', 'sad', 'surprise', 'anger']
emotion_labels = ["neutral","anger","disdain","disgust","fear","happy","sad","surprise"]

emotion_net = IENetwork(model=model_xml, weight***odel_bin)
ie = IECore()
versions = ie.get_versions("CPU")
input_blob = next(iter(emotion_net.input*****r>n, c, h, w = emotion_net.inputs[input_blob].shape
print(emotion_net.inputs[input_blob].shape)

output_info = emotion_net.outputs[next(iter(emotion_net.outputs.key********r>output_info.precision = "FP32"
exec_net = ie.load_network(network=emotion_net, device_name="CPU")
root_dir = "D:/facedb/emotion_dataset/"
count_ = 1
实现人脸检测与表情识别的代码如下:
def emotion_detect(frame):
    net = cv.dnn.readNetFromTensorflow(weight_pb, config=config_text)
    h, w, c = frame.shape
    blobImage = cv.dnn.blobFromImage(frame, 1.0, (300, 300), (104.0, 177.0, 123.0), False, False);
    net.setInput(blobImage)
    cvOut = net.forward()

    # 绘制检测矩形
    for detection in cvOut[0,0,:,:]:
        score = float(detection[2])
        if score > 0.5:
            left = detection[3]*w
            top = detection[4]*h
            right = detection[5]*w
            bottom = detection[6]*h

            # roi and detect landmark
            y1 = np.int32(top) if np.int32(top) > 0 else 0
            y2 = np.int32(bottom) if np.int32(bottom) < h else h-1
            x1 = np.int32(left) if np.int32(left) > 0 else 0
            x2 = np.int32(right) if np.int32(right) < w else w-1
            roi = frame[y1:y2,x1:x2,:]
            image = cv.resize(roi, (64, 64))
            image = image.transpose((2, 0, 1))  # Change data layout from HWC to CHW
            res = exec_net.infer(inputs={input_blob: [image]})
            prob_emotion = res['prob_emotion']
            probs = np.reshape(prob_emotion, (5))
            txt = labels[np.argmax(prob*****r>            cv.putText(frame, txt, (np.int32(left), np.int32(top)), cv.FONT_HERSHEY_SIMPLEX, 1.0, (255, 0, 0), 2)
            cv.rectangle(frame, (np.int32(left), np.int32(top)),
                         (np.int32(right), np.int32(bottom)), (0, 0, 255), 2, 8, 0)
打开摄像头或者视频文件,运行人脸表情识别的:
if __name__ == "__main__":
    capture = cv.VideoCapture("D:/images/video/Boogie_Up.mp4")
    while True:
        ret, frame = capture.read()
        if ret is not True:
            break
        emotion_detect(frame)
        cv.imshow("emotion-detect-demo", frame)
        c = cv.waitKey(1)
        if c == 27:
            break
运行截图如下:
0个评论